


 srcset="//honorathletics.ca/cdn/shop/files/gift-card-50.jpg?format=webp&v=1765107368&width=165 165w,//honorathletics.ca/cdn/shop/files/gift-card-50.jpg?format=webp&v=1765107368&width=360 360w,//honorathletics.ca/cdn/shop/files/gift-card-50.jpg?format=webp&v=1765107368&width=493 493w,
//honorathletics.ca/cdn/shop/files/gift-card-50.jpg?format=webp&v=1765107368&width=600 600w,
//honorathletics.ca/cdn/shop/files/gift-card-50.jpg?format=webp&v=1765107368&width=600 2133w"
src="//honorathletics.ca/cdn/shop/files/gift-card-50.jpg?format=webp&v=1765107368&width=370 370w"
alt="Honor Athletics Gift Card 50 $"
sizes="(min-width: 1360px) 307px, (min-width: 992px) calc((100vw - 130px) / 4), (min-width: 768px) calc((100vw - 120px) / 3), calc((100vw - 35px) / 2)"
class="motion-reduce img-fluid mx-auto lazyload"
loading="lazy"
width="2133"
height="2133">
srcset="//honorathletics.ca/cdn/shop/files/gift-card-50.jpg?format=webp&v=1765107368&width=165 165w,//honorathletics.ca/cdn/shop/files/gift-card-50.jpg?format=webp&v=1765107368&width=360 360w,//honorathletics.ca/cdn/shop/files/gift-card-50.jpg?format=webp&v=1765107368&width=493 493w,
//honorathletics.ca/cdn/shop/files/gift-card-50.jpg?format=webp&v=1765107368&width=600 600w,
//honorathletics.ca/cdn/shop/files/gift-card-50.jpg?format=webp&v=1765107368&width=600 2133w"
src="//honorathletics.ca/cdn/shop/files/gift-card-50.jpg?format=webp&v=1765107368&width=370 370w"
alt="Honor Athletics Gift Card 50 $"
sizes="(min-width: 1360px) 307px, (min-width: 992px) calc((100vw - 130px) / 4), (min-width: 768px) calc((100vw - 120px) / 3), calc((100vw - 35px) / 2)"
class="motion-reduce img-fluid mx-auto lazyload"
loading="lazy"
width="2133"
height="2133">
 srcset="//honorathletics.ca/cdn/shop/files/gift-card-75.jpg?format=webp&v=1765107368&width=165 165w,//honorathletics.ca/cdn/shop/files/gift-card-75.jpg?format=webp&v=1765107368&width=360 360w,//honorathletics.ca/cdn/shop/files/gift-card-75.jpg?format=webp&v=1765107368&width=493 493w,
//honorathletics.ca/cdn/shop/files/gift-card-75.jpg?format=webp&v=1765107368&width=600 600w,
//honorathletics.ca/cdn/shop/files/gift-card-75.jpg?format=webp&v=1765107368&width=600 2133w"
src="//honorathletics.ca/cdn/shop/files/gift-card-75.jpg?format=webp&v=1765107368&width=370 370w"
alt="Honor Athletics Gift Card 50 $"
sizes="(min-width: 1360px) 307px, (min-width: 992px) calc((100vw - 130px) / 4), (min-width: 768px) calc((100vw - 120px) / 3), calc((100vw - 35px) / 2)"
class="motion-reduce img-fluid mx-auto lazyload"
loading="lazy"
width="2133"
height="2133">
srcset="//honorathletics.ca/cdn/shop/files/gift-card-75.jpg?format=webp&v=1765107368&width=165 165w,//honorathletics.ca/cdn/shop/files/gift-card-75.jpg?format=webp&v=1765107368&width=360 360w,//honorathletics.ca/cdn/shop/files/gift-card-75.jpg?format=webp&v=1765107368&width=493 493w,
//honorathletics.ca/cdn/shop/files/gift-card-75.jpg?format=webp&v=1765107368&width=600 600w,
//honorathletics.ca/cdn/shop/files/gift-card-75.jpg?format=webp&v=1765107368&width=600 2133w"
src="//honorathletics.ca/cdn/shop/files/gift-card-75.jpg?format=webp&v=1765107368&width=370 370w"
alt="Honor Athletics Gift Card 50 $"
sizes="(min-width: 1360px) 307px, (min-width: 992px) calc((100vw - 130px) / 4), (min-width: 768px) calc((100vw - 120px) / 3), calc((100vw - 35px) / 2)"
class="motion-reduce img-fluid mx-auto lazyload"
loading="lazy"
width="2133"
height="2133">
 srcset="//honorathletics.ca/cdn/shop/files/gift-card-100.jpg?format=webp&v=1765107368&width=165 165w,//honorathletics.ca/cdn/shop/files/gift-card-100.jpg?format=webp&v=1765107368&width=360 360w,//honorathletics.ca/cdn/shop/files/gift-card-100.jpg?format=webp&v=1765107368&width=493 493w,
//honorathletics.ca/cdn/shop/files/gift-card-100.jpg?format=webp&v=1765107368&width=600 600w,
//honorathletics.ca/cdn/shop/files/gift-card-100.jpg?format=webp&v=1765107368&width=600 2133w"
src="//honorathletics.ca/cdn/shop/files/gift-card-100.jpg?format=webp&v=1765107368&width=370 370w"
alt="Honor Athletics Gift Card 50 $"
sizes="(min-width: 1360px) 307px, (min-width: 992px) calc((100vw - 130px) / 4), (min-width: 768px) calc((100vw - 120px) / 3), calc((100vw - 35px) / 2)"
class="motion-reduce img-fluid mx-auto lazyload"
loading="lazy"
width="2133"
height="2133">
srcset="//honorathletics.ca/cdn/shop/files/gift-card-100.jpg?format=webp&v=1765107368&width=165 165w,//honorathletics.ca/cdn/shop/files/gift-card-100.jpg?format=webp&v=1765107368&width=360 360w,//honorathletics.ca/cdn/shop/files/gift-card-100.jpg?format=webp&v=1765107368&width=493 493w,
//honorathletics.ca/cdn/shop/files/gift-card-100.jpg?format=webp&v=1765107368&width=600 600w,
//honorathletics.ca/cdn/shop/files/gift-card-100.jpg?format=webp&v=1765107368&width=600 2133w"
src="//honorathletics.ca/cdn/shop/files/gift-card-100.jpg?format=webp&v=1765107368&width=370 370w"
alt="Honor Athletics Gift Card 50 $"
sizes="(min-width: 1360px) 307px, (min-width: 992px) calc((100vw - 130px) / 4), (min-width: 768px) calc((100vw - 120px) / 3), calc((100vw - 35px) / 2)"
class="motion-reduce img-fluid mx-auto lazyload"
loading="lazy"
width="2133"
height="2133">
 srcset="//honorathletics.ca/cdn/shop/files/gift-card-200.jpg?format=webp&v=1765107368&width=165 165w,//honorathletics.ca/cdn/shop/files/gift-card-200.jpg?format=webp&v=1765107368&width=360 360w,//honorathletics.ca/cdn/shop/files/gift-card-200.jpg?format=webp&v=1765107368&width=493 493w,
//honorathletics.ca/cdn/shop/files/gift-card-200.jpg?format=webp&v=1765107368&width=600 600w,
//honorathletics.ca/cdn/shop/files/gift-card-200.jpg?format=webp&v=1765107368&width=600 2133w"
src="//honorathletics.ca/cdn/shop/files/gift-card-200.jpg?format=webp&v=1765107368&width=370 370w"
alt="Honor Athletics Gift Card 50 $"
sizes="(min-width: 1360px) 307px, (min-width: 992px) calc((100vw - 130px) / 4), (min-width: 768px) calc((100vw - 120px) / 3), calc((100vw - 35px) / 2)"
class="motion-reduce img-fluid mx-auto lazyload"
loading="lazy"
width="2133"
height="2133">
srcset="//honorathletics.ca/cdn/shop/files/gift-card-200.jpg?format=webp&v=1765107368&width=165 165w,//honorathletics.ca/cdn/shop/files/gift-card-200.jpg?format=webp&v=1765107368&width=360 360w,//honorathletics.ca/cdn/shop/files/gift-card-200.jpg?format=webp&v=1765107368&width=493 493w,
//honorathletics.ca/cdn/shop/files/gift-card-200.jpg?format=webp&v=1765107368&width=600 600w,
//honorathletics.ca/cdn/shop/files/gift-card-200.jpg?format=webp&v=1765107368&width=600 2133w"
src="//honorathletics.ca/cdn/shop/files/gift-card-200.jpg?format=webp&v=1765107368&width=370 370w"
alt="Honor Athletics Gift Card 50 $"
sizes="(min-width: 1360px) 307px, (min-width: 992px) calc((100vw - 130px) / 4), (min-width: 768px) calc((100vw - 120px) / 3), calc((100vw - 35px) / 2)"
class="motion-reduce img-fluid mx-auto lazyload"
loading="lazy"
width="2133"
height="2133">


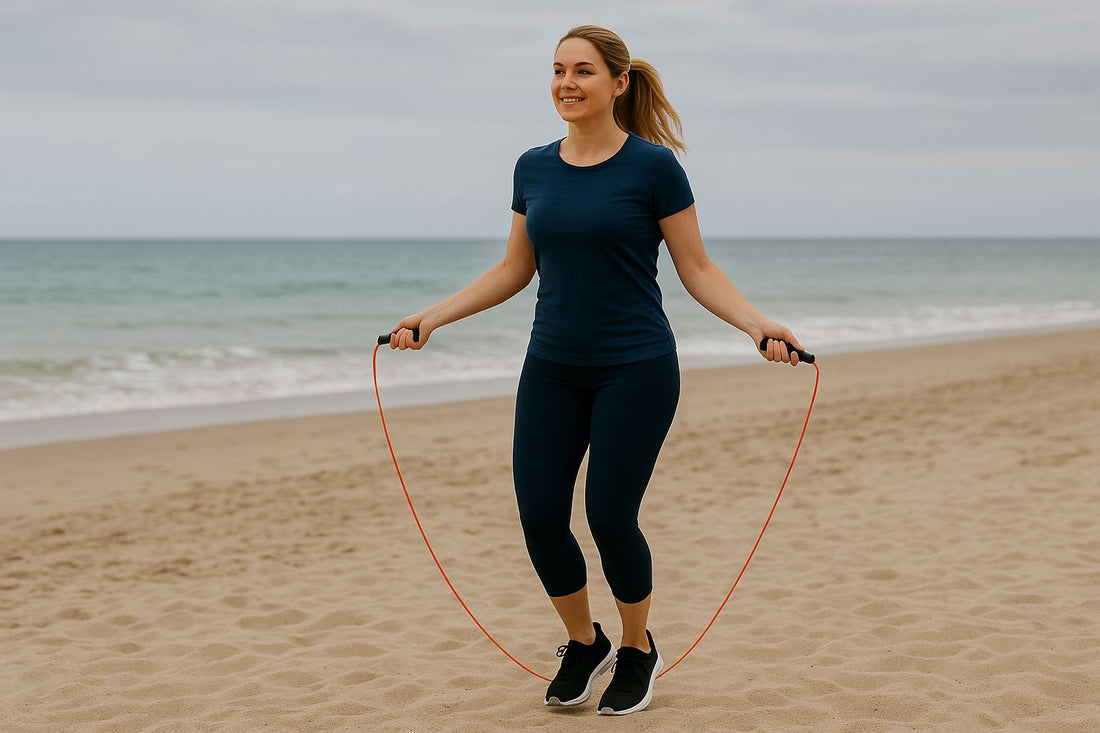
Jump Rope Beginner’s Guide: A Safe, Smart Start from Day One

13 August 2025
New to jump rope? Learn the safe way to start—right rope length, shoes, and surface—plus a simple 2-week plan, warm-up, and form cues to avoid injury and see results fast.
Why begin with jump rope?
Jump rope is affordable, portable, and time‑efficient. Done correctly, it boosts cardiovascular fitness, coordination, and muscular endurance without requiring a gym or large space. In your first weeks, a few smart choices—rope length, surface, shoes, and pace—will determine how fast you progress and how comfortably you avoid injury. This guide gives you everything you need for a confident start.

1) Get the gear right: Rope length, shoes, and surface
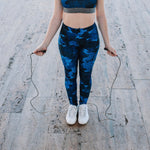
Rope length (quick rule): Step on the middle of the rope and pull the handles up—where the cable meets the handle should reach roughly your armpits. This baseline is forgiving for beginners and easy to fine‑tune.
Shoes: Choose supportive trainers with adequate cushioning. Good shock absorption protects your ankles, shins, and knees during the learning phase.
Surface: Softer is better. Wood flooring, rubber gym mats, or a fitness mat reduce impact compared with bare concrete. If you must jump on hard ground, keep sessions short and technique crisp.
2) Core technique cues: Low jump, wrist‑driven, soft landing
- Turn from the wrists, not the shoulders. Keep elbows close to your sides and shoulders relaxed. Wrist‑driven rotation preserves rhythm and prevents early fatigue.
- Jump low. 1–2 inches (2–3 cm) is plenty. Higher jumps waste energy and increase landing forces.
- Land on the balls of your feet. Avoid heel strikes; aim for quiet, springy landings to distribute load through the calf‑ankle complex.
- Neutral posture. Tall chest, eyes forward, light core brace.
- Breathe with the rhythm. Try a simple pattern like a short exhale every two or three hops.
3) Warm‑up & movement prep (5 minutes)
A short warm‑up increases blood flow, primes the nervous system, and reduces injury risk. Try this 4–5 minute sequence:
- Easy march or jog in place (1 min)
- Ankle circles + calf pumps (1 min)
- Dynamic hip openers/lunges (1 min)
- Rope shadowing (30 s)—mimic wrist turns without a rope
- Light single unders (1–2 min)
Then begin your first work set. Short intervals are safest for beginners.

4) Your first 2‑week plan (true beginners)
Goal: Lock in rhythm and technique, condition joints gradually, and avoid shin pain or overuse.
Week 1 (3 days):
- Total work: 6–9 minutes
- Template: 30 s jump / 30 s rest × 6–9 rounds
- Focus: low jumps, wrist turns, soft forefoot landings
- Breathing: exhale every 2–3 hops; keep shoulders relaxed
Week 2 (3–4 days):
- Total work: 10–12 minutes
- Template: 40 s jump / 20 s rest × 10–12 rounds
- Add 1–2 rounds of easy variations (e.g., side swings, high knees) while keeping jumps low
Short intervals let you practice quality reps without form breakdown, while incremental volume builds confidence week to week.
5) Injury prevention basics: Shin splints, ankle sprains, overuse
Reduce shin‑splint risk:
- Progress gradually, favor forgiving surfaces, and keep jumps low.
- At the first sign of persistent tenderness along the shin, cut volume, review technique, and allow recovery.
Prevent ankle sprains:
- Strengthen calves and the muscles around the ankle (e.g., heel raises, banded eversion/inversion).
- Add proprioception/balance work: stand on one foot for 30–60 s, progress to unstable surfaces.
Technique safeguards:
- Common triggers include jumping too high, landing on heels, and turning from the shoulders. Maintain wrist‑led rotation and soft landings; keep intervals short as you learn.
6) 7 common mistakes (and quick fixes)
- Rope too long → Shorten to armpit height. Long ropes force wide arms and frequent trip‑ups.
- Turning from the arms → Rotate with wrists; elbows stay tucked.
- Jumping too high → 1–2 inches is enough—save energy and reduce impact.
- Heel landings → Land quietly on the balls of your feet.
- Hard surfaces → Use wood/rubber or a mat; keep concrete sessions brief.
- Rushing speed → Groove rhythm first; keep double‑under attempts short and separated by easy singles.
- Skipping the warm‑up → 4–5 minutes of prep meaningfully lowers injury risk.

7) Quick rope picks for beginners
- Beaded or thicker PVC ropes: Strong tactile/auditory feedback makes timing easier when you’re learning.
- Speed ropes: Great for double‑unders—once your single‑under rhythm is rock solid.
-
Weighted ropes: Increase upper‑body contribution; add them 1–2 days per week and build volume gradually.
Weekly mix idea: 1 technique day (beaded/PVC), 1 tempo day (speed), 1 resistance day (weighted).
8) Recovery, frequency, and progression
- Frequency: Start with 3 days/week, spacing sessions to recover.
- Tracking: Log time or rounds; add small weekly increases.
- Listen to your body: Sharp pain—especially in shins, ankles, or knees—means stop, reduce load, and review form.
- Support work: Calf stretches, ankle mobility, hip openers, and balance drills improve performance and reduce risk.
Conclusion: The best start is a controlled one
Progress comes from consistency, not heroics. With a well‑sized rope, cushioned shoes, a forgiving surface, and the cues wrist‑turn, low jump, soft landing, your first two weeks will be safe, productive, and motivating. From there you can extend intervals, add variations, and chase goals—fat loss, conditioning, or double‑unders—with confidence.
Ready? Grab your rope, warm up for five minutes, and begin with 30 s on / 30 s off. The first step is the one that changes everything.
Prev post
Fix Your Posture with Jump Rope
Updated on 20 August 2025
Next post
Speed, Weighted & Beaded Compared
Updated on 05 August 2025